So your electric hob isn’t heating up like it used to, and you're wondering if you can swap out that faulty element yourself. Well, good news, with a bit of guidance, it’s totally doable, and you might even enjoy the DIY adventure!
Understanding your hob’s anatomy is your first step. Electric hobs usually consist of several heating elements that work independently. If one goes kaput, you'll notice it pretty quickly, like when that pot of pasta stubbornly remains uncooked.
But before you grab your screwdriver, let's chat about safety. Electrics can be tricky, so turn off the power at the mains, then double-check it's off because no one needs a surprise zap while playing handyman or handywoman.
With the right tools, like a multimeter to verify the circuit and basic hand tools, you can remove the dud element and replace it with a shiny new one.
- Understanding Your Electric Hob Basics
- Identifying the Faulty Element
- Tools You Need for the Job
- Step-by-Step Replacement Guide
- Safety Tips to Consider
- When to Call a Professional
Understanding Your Electric Hob Basics
Before you dive into replacing parts on your electric hob, it's crucial to know what you're working with. Most electric hobs have either a solid plate or ceramic surface with elements underneath. These elements are the powerhouse of your hob, converting electrical energy into heat. When one breaks down, it usually means the electricity isn't being efficiently converted, leaving you with a cold dinner.
Types of Electric Hobs
There are a couple of common types of electric hobs. The first is the solid plate hob, which has visible hotplates. They're usually sturdy and a bit old-school, often found in older kitchens. Then there's the ceramic hob, which has a smooth glass top with hidden heating elements underneath. You don't see the elements, but you sure feel them when they’re working right!
How They Work
The way a hob works is pretty simple. Electricity flows through a wire coil or other conductive material. This flow generates heat, which is transferred to your pots and pans through methods like radiation or conduction, depending on whether it’s a solid or ceramic hob. Some hobs even feature thermostats to control the heat more evenly.
Why Elements Fail
Knowing how an element fails can help you detect problems early. Over time, wear and tear like continuous high-heat cooking or thermal cycling (that’s the fancy term for a lot of heat-up and cool-down cycles) can cause the element to weaken. Eventually, it might break or just stop working efficiently.
Older electrical systems can also stress the elements, especially if your circuit breaker isn’t up to handling additional load, like when you're roasting veggies and searing a steak simultaneously.
| Element Type | Average Lifespan |
|---|---|
| Solid Plate | 5-8 years |
| Ceramic | 7-10 years |
Understanding these basics can help you save time and money. When you know what's happening under that sleek glass or classic metal plate, you're not just cooking; you're engaging with your kitchen appliance on a whole new level!
Identifying the Faulty Element
Figuring out which element on your electric hob has kicked the bucket is the first step in getting back to sizzling those steaks. But, how do you do it without just randomly swapping out parts? Here's a practical approach to pinpointing the troublemaker.
Visual Inspection
Start with a straightforward visual check. Look for obvious clues like cracks, burn marks, or excessive rust on the elements. Sometimes the damage is right there, waving at you. Damaged elements often leave trails, a bit like detectives at a crime scene.
Testing the Elements
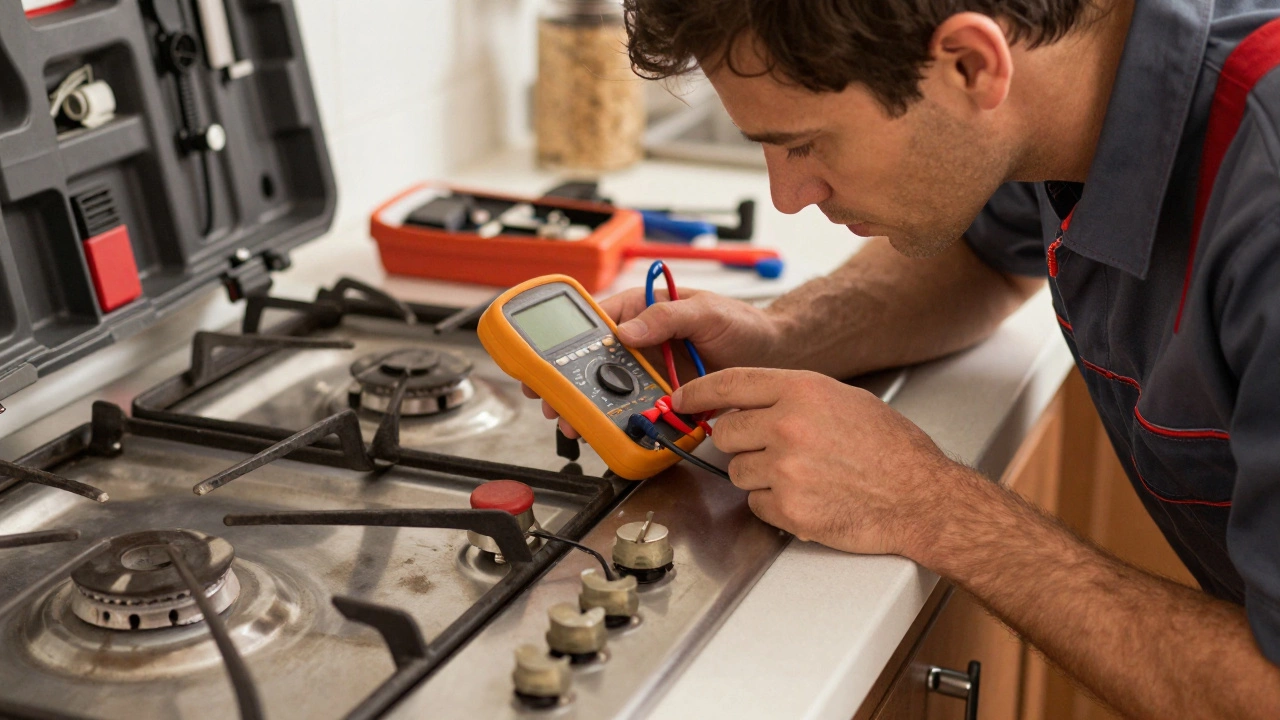
If the visual check doesn’t solve the puzzle, it's time to get technical. You'll need a multimeter for this job. Not got one? They’re inexpensive and super handy for DIY repairs.
- Turn off the power and unplug the hob, just to be doubly safe.
- Remove the hob’s elements carefully.
- Set your multimeter to the ohms setting. About 20 ohms is a good range for these tests.
- Touch a probe to each terminal on the element. A working element will usually show a reading between 20 and 40 ohms.
- If the reading is zero or infinitely high, you’ve found your culprit.
Listen for Audio Cues
Sometimes, our ears can help too. Listen for irregular clicks or buzzing when all elements are turned on. A faulty element may be giving off these sounds instead of the heat you’re after.
Check with Other Elements
If testing individual elements seems daunting, swap the suspected element with a known working one if they're interchangeable. This swap test is another sure way to pinpoint the issue.
With these methods, you should be able to confidently identify that faulty element, getting you on your way to a full repair and saving maybe a few bucks.
Tools You Need for the Job
Before you get your hands dirty replacing that hob element, let's make sure you’ve got everything you need at the ready. Missing a key tool can turn a half-hour task into an all-day affair, and no one wants that.
Essentials in Your Toolbox
- Screwdriver: A Phillips-head screwdriver is usually your go-to. Most hobs have screws you'll need this for.
- Multimeter: This is an absolute must. You'll need it to ensure the faulty element is indeed broken and verify there's no live electricity before you start meddling around.
- Pliers: Handy for gripping wires and securing connections.
- Replacement Element: Make sure it matches the specs of your current one. Check your hob’s manual or manufacturer’s website for compatibility.
- Gloves: For safety and a bit of confidence. Plus, it'll keep your hands cleaner.
Optional but Handy
While not everyone will have these lying around, if you're a bit of a DIY enthusiast, these can make the job smoother:
- Wire Stripper: If you need to replace or adjust the wiring, this tool is invaluable.
- Cable Ties: Keeps everything neat and organized, especially if you're dealing with multiple wires.
- Little Container or Bag: Trust me, it's easy to lose those tiny screws. Keep them safe and close in a container.
Have a Backup
Something to consider: have a backup plan in case things go sideways. Have the number of a professional on hand to step in if you get way over your head.
Quick Facts
Did you know? A simple multimeter, which is crucial for this job, can range from $20 to $50 depending on its features. It's a worthy investment if you plan on tackling more DIY electric repairs.

Step-by-Step Replacement Guide
Ready to get that electric hob back in action? Let's break it down into simple, manageable steps. Remember, it’s all about safety, preparation, and a bit of patience.
Step 1: Safety First
Before you start tinkering, make sure the hob is completely powered down. Switch off the main power supply to be 100% sure there's no electricity running through it. It’s better to be safe than sorry!
Step 2: Remove the Knob and Panel
Underneath your hob's knobs are screws that hold the control panel in place. Unscrew these using a suitable screwdriver and gently lift off the panel, exposing the elements below.
Step 3: Identify and Remove the Faulty Element
Next, locate the element that's not working. Once spotted, detach it by unfastening any screws or clips and disconnecting the attached wires. Remember their positions, as you’ll reconnect them later.
Step 4: Install the New Element
Time to fit in the new element. Attach the wires exactly as they were on the faulty one, ensuring they’re secure and snug. Fasten it with its screws or clips.
Step 5: Reassemble the Hob
With the new element in place, it’s time to piece everything back together. Reattach the control panel and secure it with its screws. Then, pop the knob back on.
Step 6: Test Your Work
Turn the power back on and give your hob a test run. If everything's heating as it should, you’ve done a stellar job!
Wiggle Room for Pro Help
If at any point things seem off, or if it gets too tricky, there's no shame in calling a professional. Safety always comes first.
Replacing hob elements can seem intimidating at first, but once you get into it, you might find it’s easier than you thought. Plus, you'd likely save some bucks doing it yourself!
Safety Tips to Consider
When diving into electric hob repair, safety should always be your number one priority. Replacing a hob element involves dealing with electricity, and it's crucial to take the right steps to avoid any mishaps.
Turn Off the Power
Before you start any work, make sure you cut off the power supply to your hob at the mains. Double-check with a tester to confirm that there’s no live current. Safety first, always!
Gather the Right Gear
Using the right tools not only makes the job easier but also safer. A multimeter is a must-have for checking electrical currents. You’ll also need insulated screwdrivers to avoid any risky situations.
Wear Safety Gear
Slip on a pair of rubber or insulated gloves. Keeping your hands protected from accidental shocks is vital. Wearing safety goggles can also be a wise move to protect your eyes from any unexpected sparks or debris.
Follow Manufacturer Instructions
Every electric hob model can be a little different, so it’s wise to follow the manufacturer’s guide when replacing an element. This ensures you don't miss any model-specific details that could affect the job's safety.
Work in a Clean, Dry Area
Set up your workspace in a dry area to prevent any moisture from interfering with your electronics. Also, keep your workspace tidy, minimizing the risk of tripping over stray tools or wires.
Check Your Work
Once you've replaced the hob element, inspect your work before powering up again. Ensure everything is tightly secured, wires are correctly placed, and there’s no visible damage. DIY electric hob fixes can be rewarding, but only when done safely.
By keeping these safety pointers in mind, you can tackle an electric hob repair with confidence, knowing you're minimizing risks and setting yourself up for success.
When to Call a Professional
Alright, you've studied up on the how-tos and gotten your toolkit ready, but you're feeling a bit unsure whether you should keep going with this electric hob repair. There comes a time when calling in a pro might just be the smartest move.
Tricky Wiring and Connections
Electric hobs can have complicated wiring. If you take off the back panel and feel like you're staring at a labyrinth of wires, it's probably time to take a step back. This spaghetti mess can be intimidating, and an experienced technician will have the know-how to navigate it safely.
Persistent Problems Post Repair
So you've replaced the element, but the hob still won't heat properly? If you've double-checked everything and it still doesn’t work, a pro might spot something you missed. Sometimes other issues like a busted thermostat or a defective switch might be the root cause.
Warranty Considerations
Got a warranty still active on your hob? Many warranties are voided if repairs are done by non-professionals. So before you dig in with your screwdriver, it's worth checking the fine print. Repairs under warranty can often be done for free or cheaper by authorized service centers.
Here’s a fun fact: According to industry stats, nearly 20% of DIY appliance repairs result in additional problems. Sometimes it’s just not worth risking it!
| Type of Repair | Success Rate (%) |
|---|---|
| DIY Electric Hob Element Replacement | 80 |
| Professional Repair | 98 |
Cost vs. Benefit
If you've already spent more on parts and tools than what a professional would charge, it might be time to rethink. Weighing the cost versus the benefit can save you money and hassle in the long run.
Don't sweat it if you decide to call for backup. A professional repair can be affordable and might keep your hob running longer. Plus, no one will judge you for not being an appliance whisperer. We've all been there!


