Extractor fans often go unnoticed until they start malfunctioning, but these unsung heroes play a crucial role in managing indoor air quality. If you've found yourself dealing with a noisy or inefficient fan, you might be considering a replacement. But is this task as complex as it seems?
With the right approach, replacing an extractor fan doesn't have to be a daunting challenge. By understanding the basics of how these fans work and what your space requires, you can confidently tackle this DIY project. Whether you're motivated by cutting down on labor costs or simply love a good home improvement challenge, replacing your extractor fan could be well within your reach.
- Understanding Extractor Fans
- Signs You Need a Replacement
- Choosing the Right Fan for Your Space
- Step-by-Step Replacement Guide
- Tips for Safe Installation
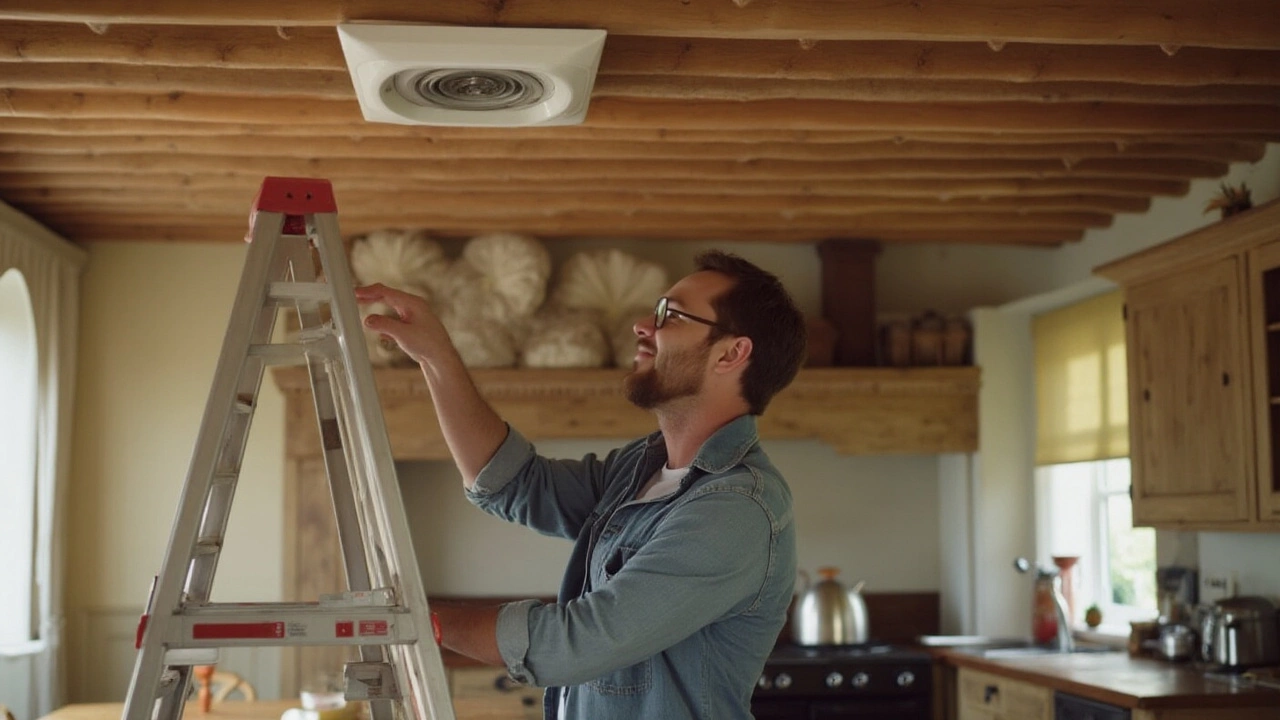
Understanding Extractor Fans
When contemplating home improvements that ensure a fresh and healthy environment, the importance of the extractor fan cannot be overstated. These devices have become indispensable in modern-day homes, helping to ventilate spaces by expelling stale air, excess moisture, and unwanted odors. Extractor fans are typically found in areas like kitchens and bathrooms where their role as air purifiers is essential in preventing issues such as mold growth and lingering smells. Understanding their basic functionality can empower you to address any issues confidently and make necessary replacements without hassle.
An extractor fan operates on a straightforward principle. By using a motorized fan blade, it pulls in air from the immediate vicinity and expels it outside through a duct system. This action is pivotal in maintaining optimal air quality and managing humidity levels, particularly in rooms with high moisture production. Different types of extractor fans are available on the market, including axial, centrifugal, and inline fans, each suited for specific placement and operational needs. Axial fans are typically installed directly on exterior walls and are most effective in situations where air has a short distance to travel. Centrifugal fans, on the other hand, are designed for longer duct runs where more power is needed to move the air outside, thus ideal for larger buildings or higher-density environments.
Knowing when an extractor fan needs replacement is as crucial as understanding its operation. Common indicators include excessive noise, reduced air flow, or complete non-operation. Noise, often caused by dust and debris accumulating on the fan blades, hampers efficiency and can gradually wear out the motor. A reliable way to assess this is by monitoring the fan's performance over time and servicing it regularly to extend its lifespan. According to the U.S. Environmental Protection Agency, "Proper ventilation can reduce indoor air pollutants and ensure the air you breathe inside is as fresh as possible."
It's essential to remember that consistency in airflow is vital for the fan's effective performance and your indoor air quality.
Technological advancements have further enhanced the functionality of extractor fans, offering features such as humidity sensors, timers, and variable speed settings. Humidity sensors automatically turn the fan on or off, ensuring optimal operation without the need for manual control, while timers allow the fan to continue running for a set period after the primary switch has been turned off, ensuring thorough ventilation. Variable speed settings enable the fan to adapt to changing environmental conditions, operating at full speed when necessary and conserving energy when demands are lower. It's worth noting that selecting a fan with energy-efficient ratings can significantly reduce your overall energy consumption.
In terms of aesthetics and integration with home designs, extractor fans have evolved to meet both functional and visual demands. Manufacturers now offer sleek, stylish designs that blend seamlessly with modern interior aesthetics. Options are available to match any style, be it minimalist or rustic. Additionally, the majority of models now offer noise reduction technology, which is a significant advancement from the traditionally noisy appliances.
In summarizing the importance and function of extractor fans, consider how integrating these systems into your home can dramatically affect your quality of life. By facilitating proper ventilation and maintaining air purity, they create a safer, more pleasant environment for you and your family. Next, you'll discover how to identify when a replacement is needed, helping you maintain this essential home feature effectively.
Signs You Need a Replacement
Is your trusty extractor fan suddenly becoming more of a noisy nuisance than a quiet companion? This could be the first sign that something's amiss. Age and frequent use can degrade the motor, causing it to emit louder sounds than usual. It's not just about the whirring sound; rattling or grinding noises might indicate parts that are worn out or loose within the unit, suggesting it's time to consider a replacement. These auditory cues are often the earliest signs pointing toward the need for an upgrade.
Another telltale sign is decreasing effectiveness. If you've noticed your home is suddenly more humid or the kitchen is retaining odors longer than it used to, the fan might not be pulling air through as it should. Clogged or ineffective fans are much less efficient at removing moisture or smoke, which can lead to bigger issues like mold growth or stubborn cooking smells. This decline in performance can sometimes be subtle but critical; it’s vital to notice these changes before they lead to more extensive problems.
Visual inspection can also reveal if your fan needs replacing. Look closely at the unit itself, are there visible cracks or signs of rust and corrosion? These physical signs show the fan has weathered a fair amount of wear and tear, possibly impacting its ability to function correctly. A damaged or deteriorating fan not only performs poorly but can also become a safety hazard due to loose wiring or exposed electrical components.
According to a study by the Home Ventilation Institute, "Regular maintenance and timely replacement of ventilation systems can improve efficiency by up to 20% while significantly extending the appliance's life."
Consider the age of your fan. Many extractor fans have a lifespan of about 10-15 years, depending on the quality and how heavily it’s used. If your fan is nearing or has surpassed this age range, it may be more cost-effective and safer to replace it rather than repair it repeatedly. Older models might not meet today’s home improvement standards for efficiency and safety, making a modern replacement a wise investment.
DIY guide enthusiasts might also see flickering or inconsistent power as a warning sign. This erratic behavior can indicate electrical issues within the fan, which can lead to fire hazards. If your fan is slow to respond or refuses to start altogether, it’s usually a definitive sign that the internal components are failing or the electrical connections are corroded. Replacement in such cases isn't just about convenience; it's also about ensuring safety standards within your living space.
Choosing the Right Fan for Your Space
When it comes to selecting the best extractor fan for your home, understanding your specific needs is key. The first step is to assess the room where the fan will be installed. Bathrooms and kitchens, being high-moisture areas, typically require more powerful ventilation solutions. The size of the room is also important; a small powder room won't need as much extraction power as a large, open-concept kitchen. Consider the layout, existing ductwork, and proximity to outdoor ventilation points.
One crucial factor to consider is the fan's extraction rate, commonly measured in cubic feet per minute (CFM) or liters per second (l/s). The higher the CFM, the more air the fan can move per minute. Adequate CFM ensures efficient removal of steam, cooking odors, and other airborne impurities, improving indoor air quality. It's generally recommended that bathrooms need about 1 CFM per square foot, while kitchens might need significantly more depending on the cooking habits and available space.
Noise level is another aspect that can significantly impact your choice. Fans are often rated in sones, a unit that measures loudness as perceived by the human ear. A quiet fan is typically rated around 1.5 sones, equivalent to the sound of a quiet refrigerator. This might be ideal for a bathroom adjacent to a bedroom, whereas a slightly noisier fan might be acceptable in a kitchen or garage. Deciding on what's tolerable depends on personal comfort levels and the space in question.
Energy efficiency should not be overlooked. Look for fans with an Energy Star rating, which indicates that the fan meets strict efficiency guidelines set by both the Environmental Protection Agency and the U.S. Department of Energy. These fans use less electricity, translating to savings on your utility bills and reduced environmental impact.
According to the U.S. Department of Energy, "Upgrading to a more energy-efficient model can save up to 50% on energy costs." This not only benefits the homeowner but also contributes to broader efforts to conserve energy.
Sometimes people choose aesthetics over function. Modern extractor fans come with various design options and features, including smart technology that allows remote control via smartphone apps. Consider whether a sleeker, more modern model would fit the style of your home or if a more traditional style is appropriate. It’s also possible to find units that integrate lighting, offering practicality and style in one package, especially useful in dimly lit areas.
Budget planning should be part of your decision-making process. While it might be tempting to skimp on quality to save money upfront, investing in a reliable, efficient fan replacement can prevent costly repairs or replacements down the road. Weigh the initial costs against long-term benefits such as durability, maintenance needs, and potential energy savings. With these considerations in mind, anyone can select an extractor fan that not only meets but exceeds their expectations in every category.
Step-by-Step Replacement Guide
Replacing an extractor fan might initially feel like opening up a complex mechanical world, but it's actually a straightforward process if approached methodically. Before diving in, ensure you have all required tools and materials handy. Essentials include a screwdriver set, wire strippers, a voltage tester, and of course, the new fan unit with appropriate mounting kits. Confirming that the electricity is off in your work area is non-negotiable—take no chances when it comes to safety.
Begin by removing the cover of your existing fan. Usually, it’s just a matter of unscrewing or unclipping the cover to access the interior components. Once open, use the voltage tester to double-check that the power is indeed off. Safety first, always. With that assurance, disconnect the wiring by loosening the terminal screws. Remember to label each wire or take a picture for reference, preventing connection errors later on. Detach the fan unit by removing all screws and carefully taking it out of its housing.
"A good home improvement project can be as satisfying as finishing a great meal you cooked from scratch," says editor Jason Carpenter from Home Repair Magazine.
Now, it’s time to prepare the new fan. Start by comparing the old bracket with the new one, ensuring a good fit. If necessary, drill new holes or adapt the mounting points for precision. Holding the new fan securely, connect the wires by matching their colors to the labeled terminals—doing this correctly guarantees that your unit runs smoothly once reconnected to power. Securely tighten the terminals and ensure there are no loose ends or exposed wires that could cause shorts or safety issues.
Reinstalling and Testing
Slide the new fan into its housing and fasten it with screws. Double-check for stability as a loose fixture can lead to excessive noise and inefficient operation. Once everything is in place, fit the cover back on, ensuring it clicks or screws in securely. Now, it’s time for the moment of truth—restore power and conduct a test run. Listen for any unusual sounds and watch for abnormal vibration. If your fan operates smoothly, pat yourself on the back, you’ve successfully replaced an extractor fan!
Troubleshooting common issues is part and parcel of this process. Should the fan not operate, double-check the wiring and power supply. Faulty manufacturing is rare, but possible, so consult the fan's manual or reach out to the manufacturer’s customer service if you hit a roadblock. With diligence and the right approach, replacing an extractor fan becomes a manageable, rewarding endeavor that enhances your home's air quality.

Tips for Safe Installation
Embarking on the journey of replacing an extractor fan can be rewarding, but safety should be your top priority. Your goal is to ensure efficient air circulation without compromising your wellbeing or home integrity. Start by gathering the necessary tools and equipment you'll need for the replacement process. These typically include screwdrivers, wire cutters, a voltage detector, and a mounting bracket if required. Before you even think about disconnecting wires or dismantling components, make sure to turn off the power to the fan at the breaker box. This precaution may seem obvious, but it's an essential first step in preventing electrical shocks, which can have dire consequences.
Choosing the right type and size of extractor fan is crucial not only for functionality but also for safe installation. A fan that is too large for the duct can lead to excessive noise and potentially hazardous overheating. Equally, a fan that's too small might work harder than it should, putting strain on the motor. To find the perfect fit, measure the space of the existing fan and check compatibility with the new model. Additionally, consult the manufacturer's guidelines and ensure that your selected fan meets local building codes and regulations. Keeping the specifications in mind will significantly reduce installation risks.
During the installation, it’s vital to handle the wiring with utmost care. If you lack confidence working with electrical components, don't hesitate to contact a professional. However, if you decide to proceed on your own, remember to use a voltage detector to ensure that all lines are completely de-energized. Securely connect wires of matching colors and make use of wire nuts to anchor them in position. Tape wiring junctions neatly to prevent them from moving or coming loose. Position the fan within the existing duct and secure it snugly using screws, ensuring the protective grill aligns correctly to avoid any vibration during operation.
Ventilation is also a key aspect during replacement. Check that the ductwork is clean and free from any obstructions that might hinder the fan's performance. Debris and build-up within ducts can degrade air quality and even pose a fire risk if not regularly cleaned. Use this opportunity to rid the ducts of dust, grease, or old insulation that might have accumulated over time. If the original ducting material is damaged or fails to meet current safety standards, consider replacing it with a modern, flame-retardant alternative.
Citing the National Electrical Code (NEC), it's advised to perform a thorough inspection of fan components for any visible wear and tear before installation. "Ensuring all parts are intact can prevent future safety hazards," the NEC suggests.
Once installation is complete, carefully test the fan to ensure it's working correctly. Switch the extractor fan on and listen for unusual sounds or vibrations. Feel the airflow to make sure it's moving smoothly without restriction. Check that the fan’s motion is steady and that all parts remain secure. This not only guarantees the fan is operating efficiently but also reassures you of a safe set-up. Taking these precautions might add a bit more time to your project, yet they are key to conducting a hassle-free and safe installation.