Bathroom Fan Installation
When working with Bathroom Fan Installation, the process of fitting a mechanical fan in a bathroom to remove moist air and odors. Also known as bathroom extractor fan fitting, it combines plumbing know‑how, electrical safety, and proper ventilation design.
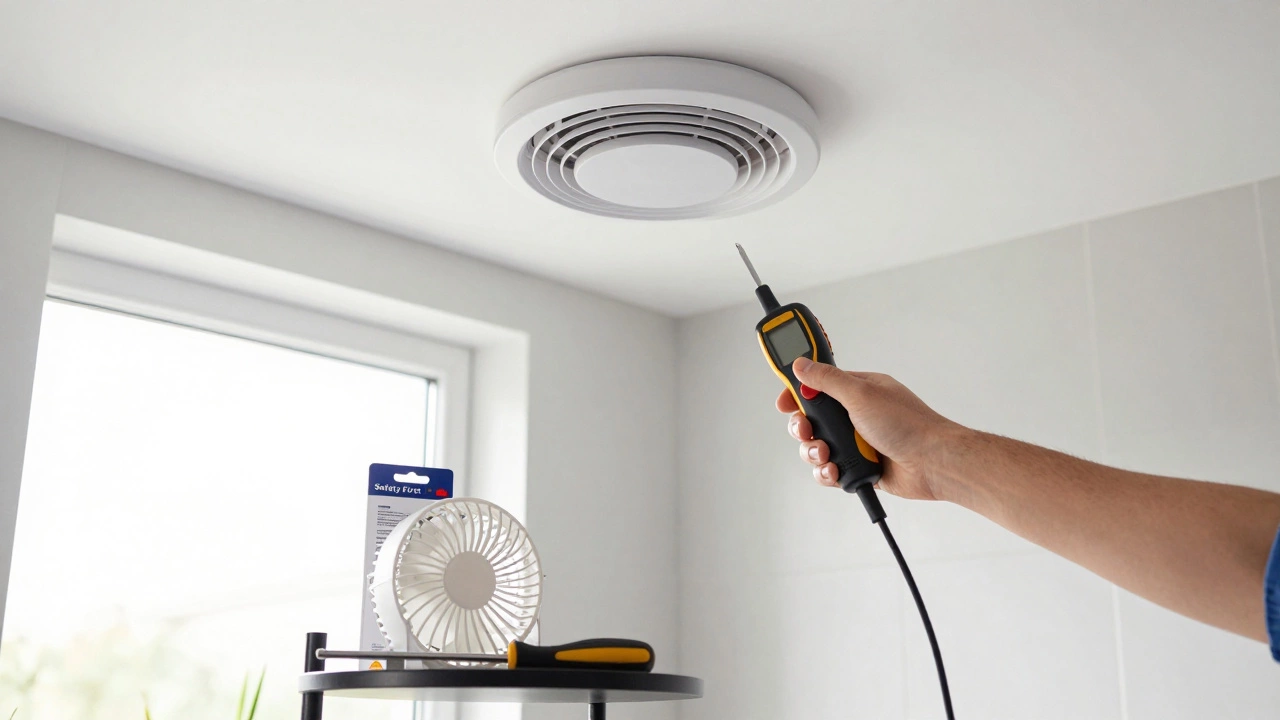
One of the first choices is the Extractor Fan, a device that pulls humid air out of a bathroom and pushes it outdoors or into a vent. Selecting the right size (measured in CFM) keeps humidity low, cuts mold risk, and reduces the need for constant cleaning. Pair that with good Ventilation, the overall airflow system that moves fresh air in and stale air out of a home, and you’ve got the core of a healthy bathroom.
Key Steps and Tips
First, figure out where the fan will sit. Most homeowners prefer a ceiling‑mounted unit because it captures steam directly from the shower zone. Measure the bathroom’s square footage, then use the rule of thumb: 1 CFM per square foot plus extra for high‑use showers. That CFM calculation is the backbone of a well‑balanced system.
Next, evaluate the wiring route. If you’re comfortable handling electricity, turn off the circuit at the consumer unit and check the existing wiring gauge. An Electrician, a qualified tradesperson who handles safe electrical connections can verify that the fan’s power needs match the circuit and that a properly rated switch or humidity sensor is installed. This step prevents overheating and keeps you within building regulations.
When mounting, use a sturdy bracket and seal the fan housing with a silicone gasket to stop drafts. After the fan is in place, test the switch, and listen for smooth airflow. A quiet, steady hum means the fan’s blades are correctly aligned and the motor isn’t strained.
Don’t overlook humidity control. Modern fans often include built‑in humidity sensors that turn on automatically when moisture levels rise. Installing one can lower your energy bills because the fan only runs when needed. If you opt for a manual switch, consider a timer so the fan continues to run for a few minutes after you finish your shower.
Finally, maintain the fan. Every six months, remove the cover and clean the grille and motor housing. Dust and lint buildup reduces efficiency and can cause louder operation. A quick vacuum or soft brush does the trick, and you’ll keep the airflow at peak performance.
Whether you go full DIY or call in a pro, these steps give you a clear roadmap to a fresh, mold‑free bathroom. Below you’ll find articles that dive deeper into fan selection, wiring safety, common pitfalls, and cost‑saving tips, so you can pick the right approach for your home.
Learn how to replace an extractor fan yourself with this detailed DIY guide. Covers safety, tool requirements, and step-by-step installation for bathrooms and kitchens.
Thinking of installing an extractor fan yourself? Get the real-world steps, tools, and tips for safe, proper bathroom or kitchen fan DIY.